|
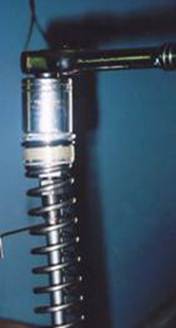
Clean everything up with a good supply
of compressed air, brake cleaner, and lint
free paper towels. This is essential;
Brawny won't do for this application. If in
doubt of the cleanliness before reassembling
a part, get out the brake cleaner. Buy 5
cans before you even start. While you're at
it, but a good set of safety glasses. First
time you ricochet this vulgar fluid into
your eyes, you'll see (nothing) why.
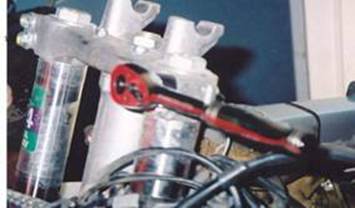
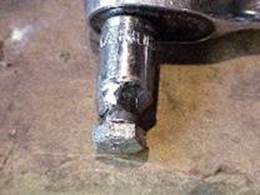
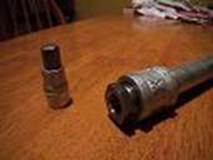
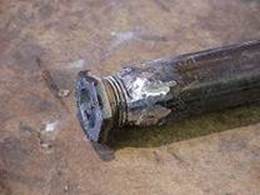
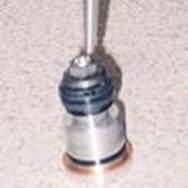
Use a file or some other abrasive tool
that you have good control over to remove
the staking on the nut of the stack. Don't
remove any more than you have to and don't
nick the seals, washers, or valve. After you
get the 12mm nut off, but before you remove
the anything else, remove a little material
from the circumference of the first two
threads. The staking distorts them and the
valve will not slide off over the bulge.
|

|
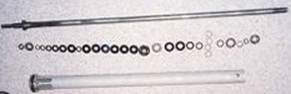
Now remove the washers and valve. Be
absolutely sure to keep everything
in order! Lay them out or hang them
on a piece of coat hanger, just
don't mix them unless you feel you
have a truly photographic memory.
Don't rely on the service manual or
fiche, they won't match
|
.
|
|
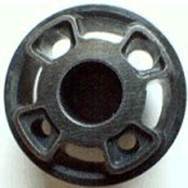
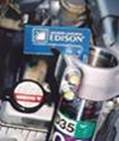
If a "plusher" ride is what you are
looking for, now you have to drill
the valve to mimic a "Gold Valve".
To the left is the valve with the
top two holes bored to; 3.64mm
/.0143 of an inch. Stock the holes
are 1.96mm / .0775 of an inch. That
is a huge difference!
|
|
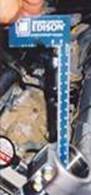
Using a 9/64th of an inch (3.57mm) or
a #27 wire gauge bit (3.64mm)
you can drill the holes out.
Obviously this picture is just for comparison, you want to
drill all four holes.
Doing this mod will require that you run a
stiffer valve stack. Stock holes are
2.65mm on 2000~2004 models but, I
just did a 2005 that had 1.96mm
holes. The picture is of a 2003
compression valve with the top two
holes drilled out and the bottom two
left stock.
|
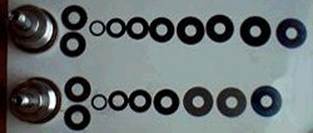
The picture to the top right shows
the stock (top) and modified
(bottom) compression stacks. This is
the standard "Fast Trail Rider"
setup. It's plusher, yet will still
handle 4' drop offs and some mild
jumping. To do this, starting from
the right, removed the 2nd, 3rd, and
4th (1-22mm x .10mm & 2-20mm x
.10mm) shims and replaced them with
two 21mm x .15 shims. All
fork shims have an ID of 8mm.
|
|
|
Reassemble the valve stack back onto
the core in the proper order, again
making sure that EVERY shim is
clean.
Install and torque the nut
to 25 to 30 INCH POUNDS,
this is very important.
More or less will change the way the
stack reacts to the oil pressure.
Stake the nut as shown
to hold it from coming apart. Only
use a threadlocker
(locktight),
if you make sure you get it only
on the threads on the nut or you
risk it wicking into the
valve stack and causing problems.
|
|
|
Single Track & Super Plush This is
the setup for everything from
Duel Sport, Desert to Single
track
Maxima 3wt light fluid
Stops bottoming about as good as stock
Compression valve drilled out.
|
Desert Racing, plusher then stock big rocks, big whoops, 4'+
drop offs, Racing
2.5wt or 3wt fluid
My Favorite
Compression valve drilled out.
|
Baja Racing, as plush as stock, Serious Racing
2.5wt or 3wt fluid
Compression valve drilled
out.
|
|
Rebound
|
Rebound
|
Rebound
|
|
(6) .10mm X 21mm
|
(6) .10mm X 21mm
|
(6) .10mm X 21mm
|
|
(1) .10mm X 13mm
|
(1) .10mm X
20mm *
|
(1) .10mm X 13mm
|
|
(2) .15mm X
21mm**
|
(1) .10mm X
13mm
|
(2) .15mm X 21mm **
|
|
(1) .10mm X
20mm
|
(1) .15mm X 21mm **
|
(1) .10mm X
21mm
|
|
(1) .10mm X 18mm
|
(1) .10mm X
20mm
|
(1) .10mm X 20mm
|
|
(1) .10mm X 16mm
|
(1) .10mm X 18mm
|
(1) .10mm X 18mm
|
|
(1) .10mm X 14mm
|
(1) .10mm X 16mm
|
(1) .10mm X 16mm
|
|
(1) .10mm X 12mm
|
(1) .10mm X 14mm
|
(1) .10mm X 14mm
|
|
(1) .10mm X 11mm
|
(1) .10mm X 12mm
|
(1) .10mm X 12mm
|
|
|
(1) .10mm X 11mm
|
(1) .10mm X 11mm
|
|
|
|
|
|
Compression
|
Compression
|
Compression
|
|
(2) .10mm X 22mm
|
(2) .10mm X 22mm
|
(2) .10mm X 22mm
|
|
(1) .10mm X 21mm
|
(1) .15mm X 21mm
|
(1) .15mm X 21mm
|
|
(2) .10mm X 20mm
|
(1) .10mm X 20mm
|
(2) .10mm X 20mm
|
|
(1) .10mm X 18mm
|
(1) .10mm X 18mm
|
(1) .10mm X 18mm
|
|
(1) .10mm X 16mm
|
(1) .10mm X 16mm
|
(1) .10mm X 16mm
|
|
(1) .10mm X 14mm
|
(1) .10mm X 14mm
|
(1) .10mm X 14mm
|
|
(1) .10mm X 11mm
|
(1) .10mm X 11mm
|
(1) .10mm X 11mm
|
|
(1) .40mm X
10mm***
|
(1) .40mm X
10mm***
|
(1) .40mm X
10mm***
|
|
|
|
|
* For smaller or less whoops in your
riding move this shim down with the
other .10mm X 20mm shim. this will be
better for single track and desert
racing.
** this is for .45kg/mm springs add
another .15mm X 21mm for .47kg/mm
springs
*** Don't have to have this.
|
Stock Bike (5wt oil)
|
Another
Shop (5wt Fluid) RB
|
Another
Shop (2.5wt fluid) PC
Nice for racing
|
|
Rebound
|
Rebound
|
Rebound
|
|
(7) .10mm X 21mm
|
(4) .10mm X
21mm
|
(5) .10mm X
21mm
|
|
(1) .10mm X 13mm
|
(1) .10mm X
16mm
|
(1) .10mm X
16mm
|
|
(1) .10mm X 20mm
|
(1) .10mm X
13mm
|
(3) .10mm X 21mm
|
|
(1) .10mm X 18mm
|
(3) .10mm X 21mm
|
(1) .10mm X
13mm
|
|
(1) .10mm X 16mm
|
(1) .10mm X 18mm
|
(1) .10mm X
20mm
|
|
(1) .10mm X 14mm
|
(1) .10mm X 16mm
|
(1) .10mm X 18mm
|
|
(1) .10mm X 12mm
|
(1) .10mm X 14mm
|
(1) .10mm X 16mm
|
|
(1) .10mm X 11mm
|
(1) .10mm X 12mm
|
(1) .10mm X 14mm
|
|
|
(1) .10mm X 11mm
|
(1) .10mm X 12mm
|
|
|
|
(1) .10mm X 11mm
|
|
|
|
Compression
|
|
Compression
|
Compression
|
(4) .10mm X 22mm
|
|
(2) .10mm X 22mm
|
(4) .10mm X 22mm
|
(1) .10mm X 16mm
|
|
(2) .10mm X 20mm
|
(1) .10mm X 14mm
|
(2) .10mm X
21mm
|
|
(1) .10mm X 18mm
|
(3) .10mm X 20mm
|
(2) .10mm X 20mm
|
|
(1) .10mm X 16mm
|
(1) .10mm X 18mm
|
(1) .10mm X 18mm
|
|
(1) .10mm X 14mm
|
(1) .10mm X 16mm
|
(1) .10mm X 16mm
|
|
(1) .10mm X 11mm
|
(1) .10mm X 14mm
|
(1) .10mm X 14mm
|
|
|
(1) .10mm X 11mm
|
(1) .10mm X 11mm
|
I get my shims from here: Race
Tech
Compression adjustment
should be close at 16 clicks out
and rebound at 11~12 clicks out.
Desert Race setup is a great all
around setup. With compression
valve drilled out and the lighter
fluid this is one plush setup that
resists bottoming a lot more then
the stock setup. I use 110mm of
fluid measurement* and less will
give a plusher ride to handle the
jagged rocks.
|
When working out
the rebound shim stack
you have to take into
effect how stiff the
spring you are using.
Stiffer springs
(.47kg/mm and higher)
need a stiffer slow
rebound stack.
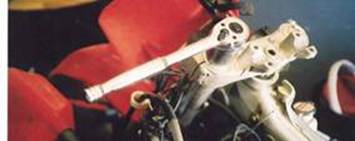
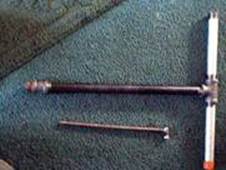
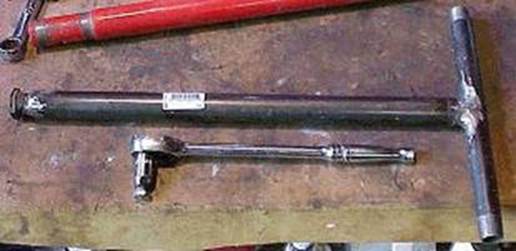
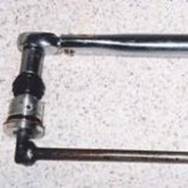
The rebound stack is located at
the end of the damper rod
that was attached to the
fork cap. With the
compression stack removed,
just pull up the rod. The
rod will come out with a
large aluminum piece (fork
damper) and a smaller piece
on the end, slightly cone
shaped, called the Oil lock.
|
|
|
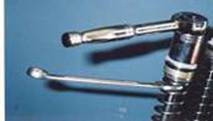
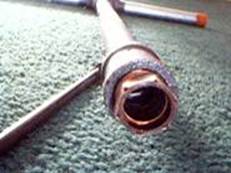
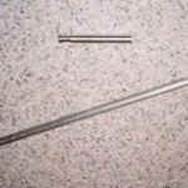
Once the assembly is out, slide the
damper rod back down through
the damper to expose the
rebound stack. There is a Teflon
bushing in the damper end,
be careful not to score it
with the threaded rod end.
|
|

|
On the rebound stack I would run (6) 21mm
X .10mm, 13mm cross over shim, (2)
21mm X .15mm, (2) 20mm X .10mm, 18mm
X .10mm, 16mm X .10mm, 14mm X .10mm,
(I like leaving out the 12mm X .10mm
shim here, I use it elsewere.)
11mm X .10mm
Install and torque the nut
to 25 to 30 INCH POUNDS,
this is very important.
This valve setup, in combination with
.45kg Eibach
springs, will carry a 190lb rider
with gear with true finesse.
"It's as much an art as it is a
science"........ The stock setup has
to much
flow going through the by-pass
adjustment for full bend of the
shims to be reached. There is also a
mid-compression stack there also
that is just right if the adjustment
screws are a little stiff. You get
better control of rebound if more of
the fluid is forced through the
valve. With the lighter fluid you
can push more fluid at a faster
rate....closing down the by-pass let's
the shims control the flow more instead
of it just going through the by-pass
hole.
That's why I run at 11~12
clicks out on the rebound for the
forks. The
top adjuster on the Forks is to
adjust the rebound. I start this
at 11~12 click out (click the
adjuster in, clockwise, till it
just stops; then count 11 clicks
out). The Compression adjuster is
in the bottom of the fork under a
rubber plug. I start this adjuster
at 16 clicks out. Lots of trail
riders might want 18 clicks out
but, few need 14. These are good
starting points but, every bike
and rider is different.
|
I fill the forks with 650cc of Golden Spectro
Ultra light
(2.5wt) or Maxima 3wt suspension Fluid.
Then add till Measured to be 105~110 mm
from the top of the fork.
|
That's it, you're done with the
compression stack! If you are a fly
weight you can run stock springs,
then you can button things up and
call it a day. If you are in the
190lb or higher range and need to
run Eibach
.45 or heavier springs. You
will need to add a shim in the
rebound for stiffer springs. One
more 21mm X .15mm for each step up
in spring stiffness is close.
Cutting Stock Springs To Make them
Stiffer! Click Here->Stiffer
Springs
Cutting your 502~506mm (they settle) Stock
fork springs to 450mm and adding a
55mm long spacer will give you in
the range of .45kg~.46kg springs.
You will be surprised to find out that a
lot of High $$$$ fork springs that
are just one or two steps stiffer
are just that and come with the
spacer!
I buy my springs at Lindemann
Engineering: (909)
838-4587
79405 Hwy
111 Ste 9-270 La Quinta, CA
92253
They are fast and Honest about having
the spring or not! I have found Some
of the others are not or they rely on
what the computer tells them and they
don't have it.....then starts the
three month wait!
I DO NOT agree with how stiff of
springs Lindemann
Engineering recommends! Or how
stiff Race Tech Recommends! It seems
they use a computer program that is
setup for the MX track and/or
bikes. XR's Only and the others
are right on the money.
|
FORK &
SHOCK SPRING RATE GRAPH /
APPLICATION & RIDER
WEIGHT
|
|
|
Bike
|
Stock
Spring
Rates
|
140 lbs
|
160 lbs
|
180 lbs
|
200 lbs
|
220 lbs
|
240 lbs
|
260 lbs
|
280 lbs
|
300 lbs
|
|
XR400
120mm/
85mm
|
.382
kg/
9.9kg
|
.39kg/
8.6kg
|
.409kg/
9.0kg
|
.43kg/
9.5kg
|
.44kg/
10.0kg
|
.46kg/
1.05kg
|
.475kg/
10.6kg
|
.492kg/
11.0kg
|
.47kg/
11.4kg
|
.47kg/
12.kg
|
|
XR600R
125mm/
85mm
|
.39kg/
9.8kg
|
.392kg/
9.4kg
|
.409kg/
9.8kg
|
.426kg/
10.2kg
|
.442kg/
10.6kg
|
.459kg/
11.0kg
|
.475kg/
11.4kg
|
.492kg/
11.8kg
|
.47kg/
12.0kg
|
.47kg/
12.5
|
|
XR650L
130mm/
85mm
|
11.0kg/
92-3.41k
95001.44
|
.392kg/
10.3kg
|
.409kg/
10.7kg
|
.426kg/
11.1kg
|
.442kg/
11.5kg
|
.459kg/
11.9kg
|
.475kg/
12.3kg
|
.492kg/
12.7kg
|
|
|
|
XR650R
130mm
85mm
|
.43kg/
9.2kg
|
|
.41kg/
9.2kg
|
.43kg/
9.5kg
|
.45kg/
10.0kg
|
.45kg/
10.5kg
|
.47kg/
11.0kg
|
.47kg/
11.5kg
|
.49kg/
12.0kg
|
.49kg/
12.5kg
|
|
|
 HOME HOME
|